
정구리의 우주정복
[Spring] Spring Cloud Gateway 로 API Gateway 만들기 (with Keycloak) gateway webflux spring security 설정 본문
[Spring] Spring Cloud Gateway 로 API Gateway 만들기 (with Keycloak) gateway webflux spring security 설정
Jungry_ 2024. 5. 14. 17:56저번에 만들었던 keycloak 이랑 spring 연결해놓은거를 응용해서 gateway를 만들려고 한다
우선 gateway 의 역할은
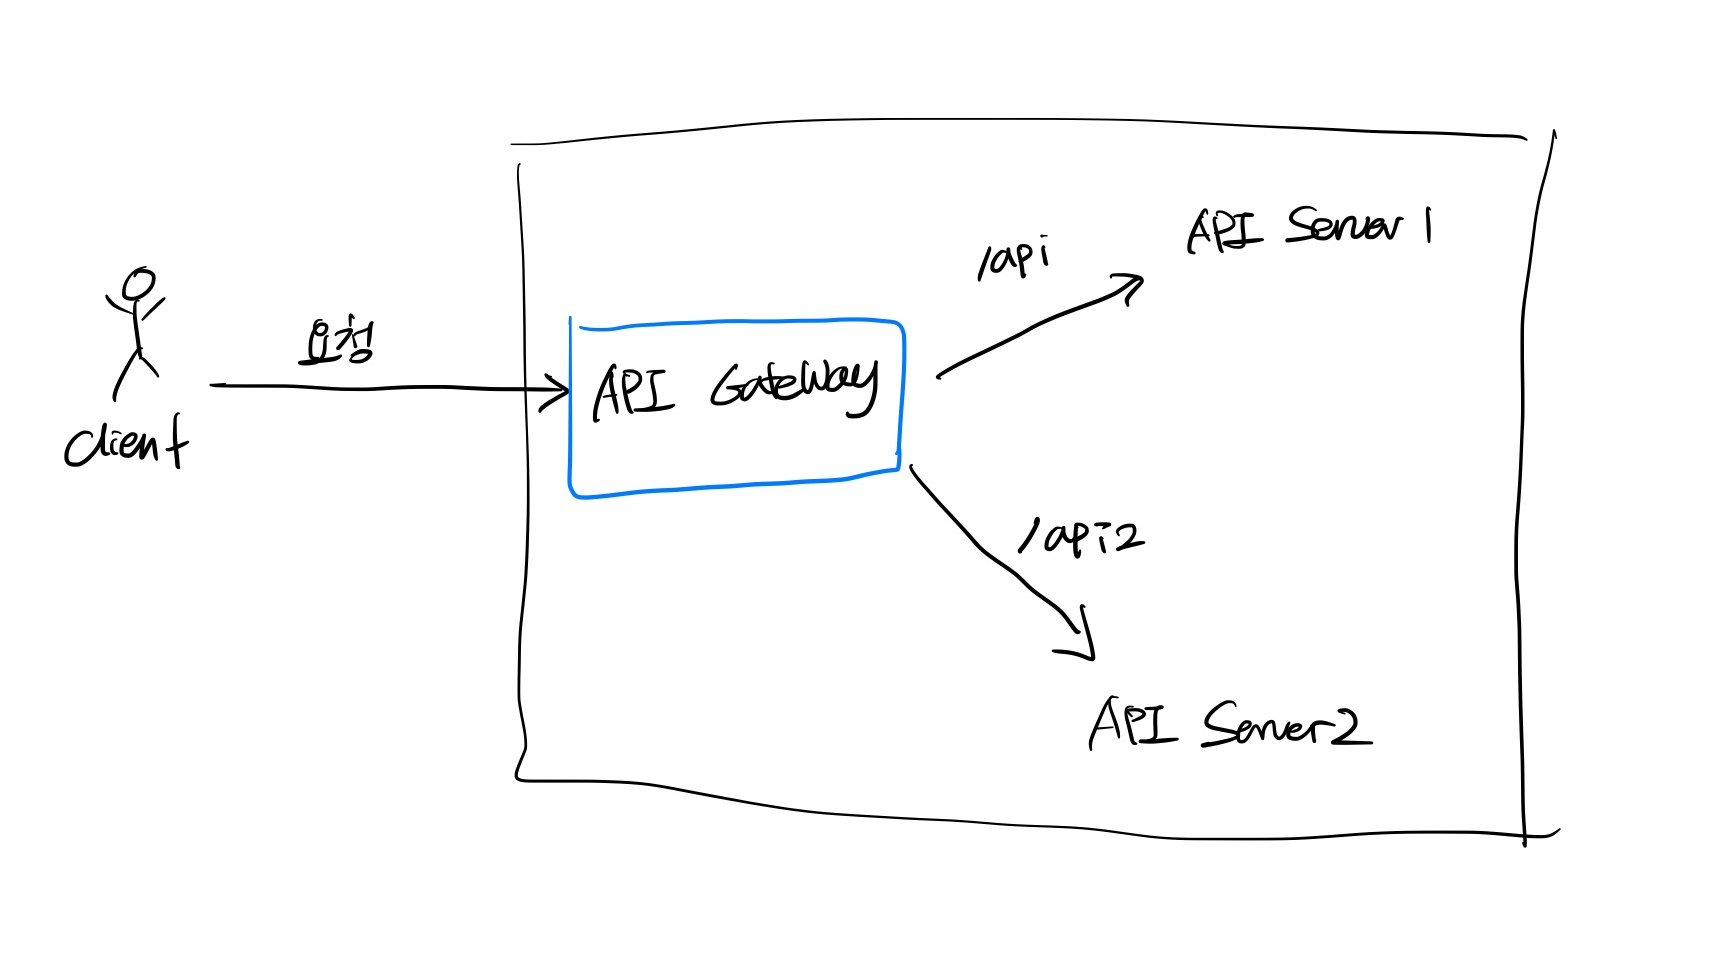
client 에서 요청을 하면 api gateway로 들어오게 되어서 게이트웨이에서 해당 api 로 라우팅을 해주는 역할이다 !!!
나는 여기에 keycloak 을 같이 써보려고 하는데 이유는 모든 api 서버마다 keycloak 연결을 해 줄 필요 없이 게이트웨이에 keycloak 을 연결해준 뒤 api 서버에서는 별도의 인증 없이 api 만 실행해주면 좋지 않을까 라는 생각이기 때문이다 !
내가 생각한 flow 는
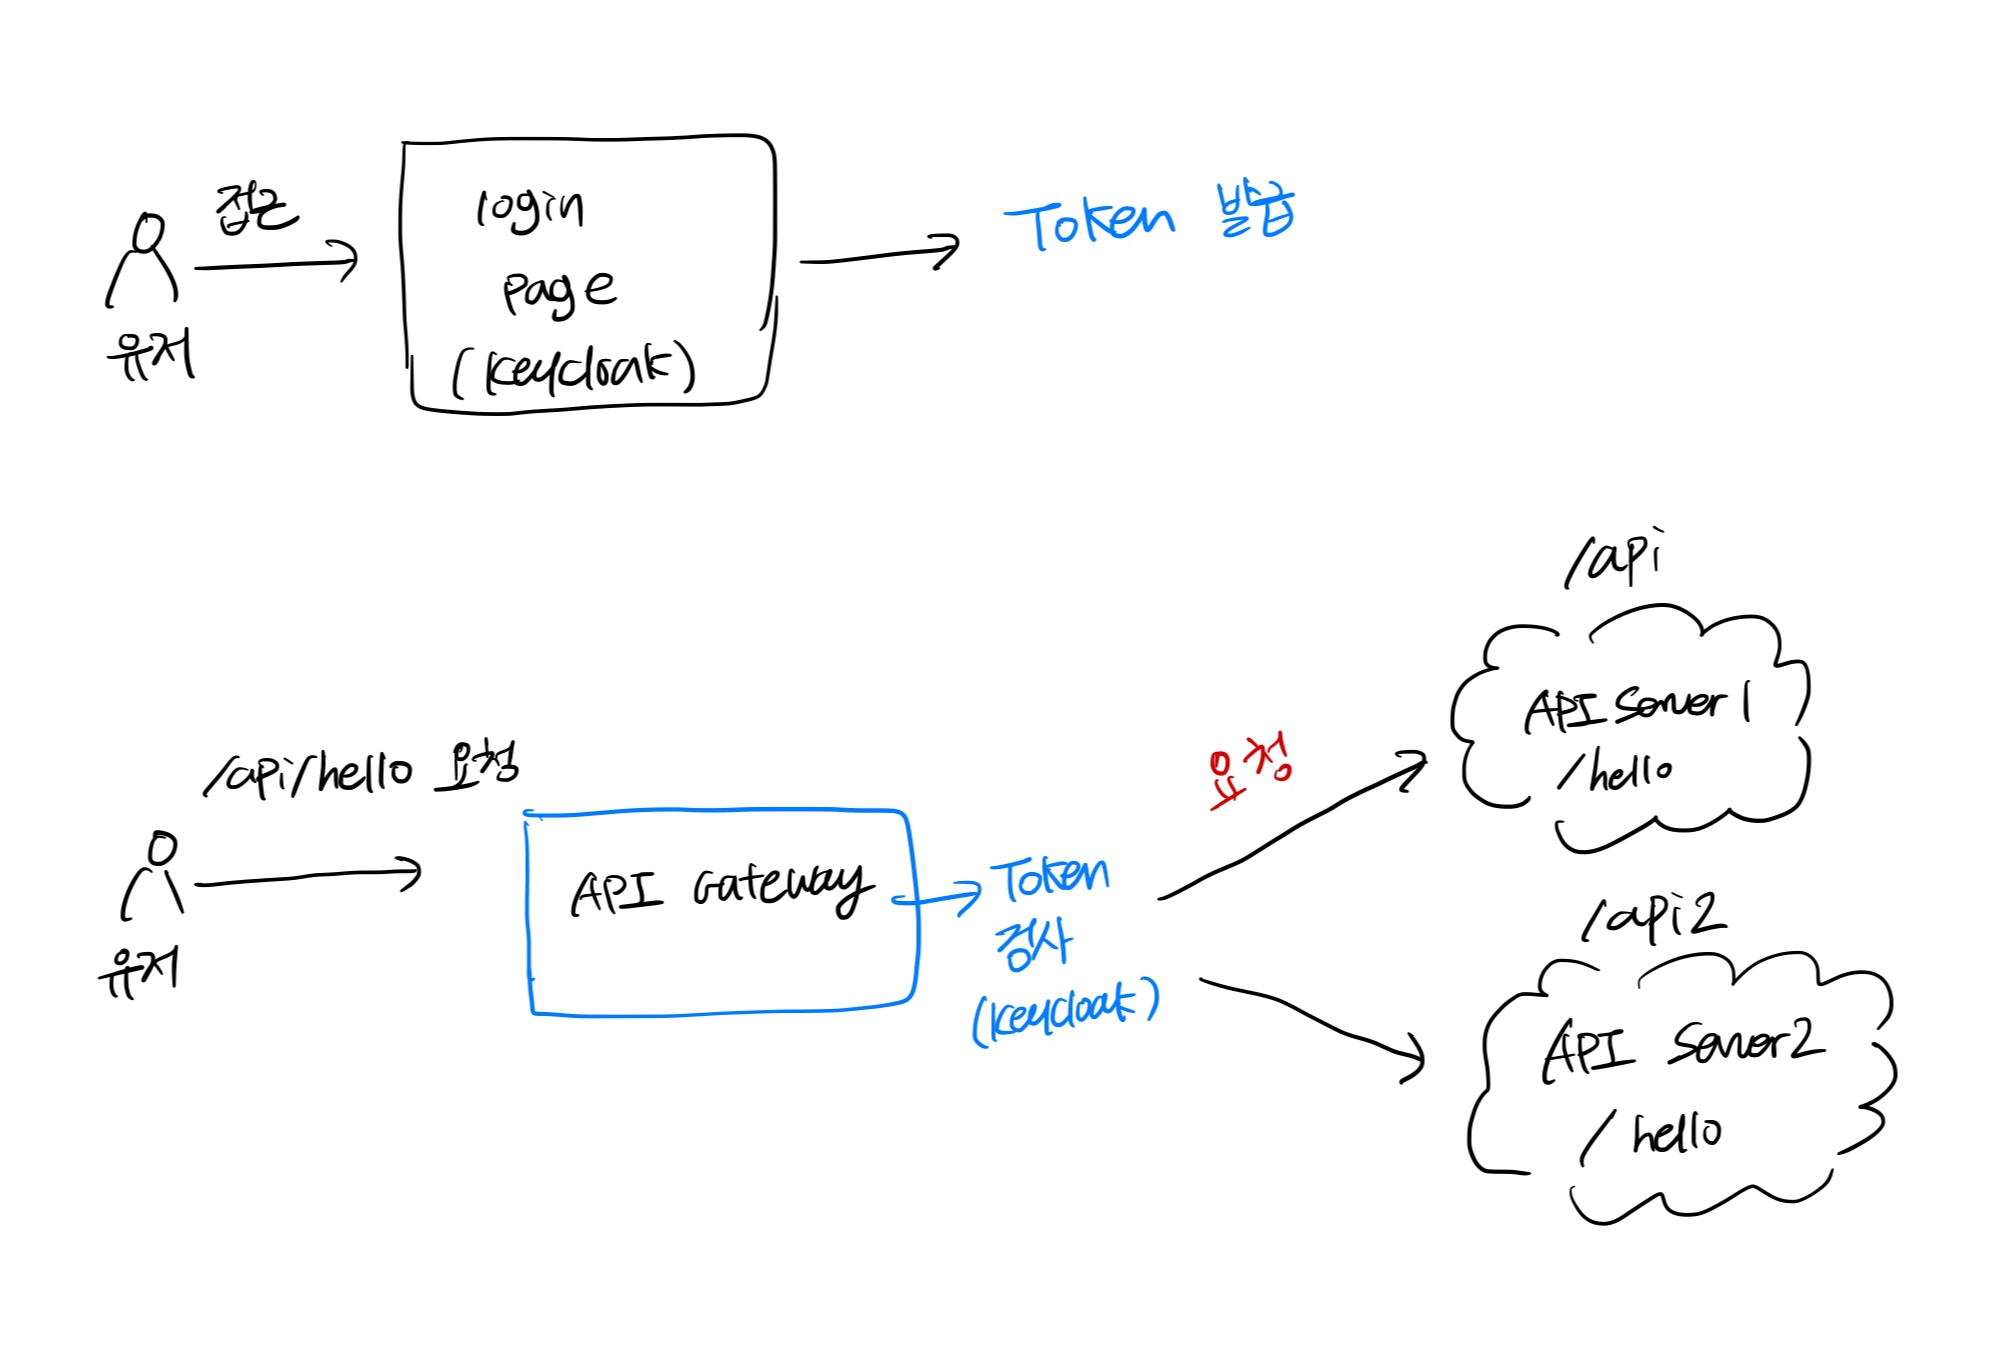
유저가 서비스에 접근 시 -> keycloak 으로 redirection -> 로그인 하면 token 이 발급됨 + 서비스에 접근 -> 서비스에서 api 요청 -> gateway 에 요청 전달 -> gateway 에서 token 유효성 확인 -> 해당하는 api server로 라우팅
해주는 플로우로 생각했다
우선 api server 를 두개 만들거다 !
첫번째는 8081 포트
두번째는 8082 포트
dependencies 는 spring web, lombok 이렇게 두개만 넣었다
이렇게 두개다
port는 8081, 8082 이렇게 해서 서버를 두개를 만들면 된다 !!!
application.yaml

spring:
  application:
    name: toygry-api

server:
  port: 8081
별도의 설정 없이 이렇게만 넣었다
컨트롤러는 이렇게 만들었다 이거는 두개 동일하게 만들면 됨 !
TestController.java

import org.springframework.web.bind.annotation.GetMapping;
import org.springframework.web.bind.annotation.RestController;

@RestController
public class TestController {

    @GetMapping("/hello")
    public String getHello() {
        return "Hello World";
    }
}
이번에는 게이트웨이 !! 저번 게시글 (https://j-ungry.tistory.com/380) 과는 차이가 좀 있다
우선 build.gradle
plugins {
    id 'java'
    id 'org.springframework.boot' version '3.2.5'
    id 'io.spring.dependency-management' version '1.1.4'
}

group = 'com.example'
version = '0.0.1-SNAPSHOT'

java {
    sourceCompatibility = '21'
}

configurations {
    compileOnly {
        extendsFrom annotationProcessor
    }
}

repositories {
    mavenCentral()
}

ext {
    set('springCloudVersion', "2023.0.1")
}

dependencies {
    implementation 'org.springframework.boot:spring-boot-starter-web'
//    implementation 'org.springframework.cloud:spring-cloud-starter-gateway-mvc'
    implementation 'org.springframework.cloud:spring-cloud-starter-gateway'
    compileOnly 'org.projectlombok:lombok'
    annotationProcessor 'org.projectlombok:lombok'
    testImplementation 'org.springframework.boot:spring-boot-starter-test'
    testRuntimeOnly 'org.junit.platform:junit-platform-launcher'
    // https://mvnrepository.com/artifact/org.springframework.boot/spring-boot-starter-data-jpa
    implementation 'org.springframework.boot:spring-boot-starter-data-jpa'
    // https://mvnrepository.com/artifact/org.springframework.boot/spring-boot-starter-security
    implementation 'org.springframework.boot:spring-boot-starter-security'
    // https://mvnrepository.com/artifact/org.springframework.boot/spring-boot-starter-oauth2-resource-server
    implementation 'org.springframework.boot:spring-boot-starter-oauth2-resource-server'
}

dependencyManagement {
    imports {
        mavenBom "org.springframework.cloud:spring-cloud-dependencies:${springCloudVersion}"
    }
}

tasks.named('test') {
    useJUnitPlatform()
}
application.yaml
spring:
  application:
    name: toygry-gateway
  cloud:
    gateway:
      routes:
        - id: toygry-api
          uri: http://localhost:8081
          predicates:
            - Path=/api/**
          filters:
            - RewritePath=/api/(?<path>.*), /$\{path}
        - id: toygry-api2
          uri: http://localhost:8082
          predicates:
            - Path=/api2/**
          filters:
            - RewritePath=/api2/(?<path>.*), /$\{path}
  security:
    oauth2:
      resourceserver:
        jwt:
          issuer-uri: https://keycloak서버/realms/realm명
          jwk-set-uri: ${spring.security.oauth2.resourceserver.jwt.issuer-uri}/protocol/openid-connect/certs
  main:
    web-application-type: reactive
server:
  port: 8080
여기서 gateway 하위에 url 에 위에서 지정한 port 번호를 정확하게 넣어줘야한다
마지막으로 SecurityVonfiguration 이다
이번에는 MVC 형태여서 SecurityFilterChain 을 사용했지만 GateWay 의 경우에는 WebFlux 형태이기 때문에 SecurityWebFilterChain 을 사용해야 한다 ..!!! (이부분 때문에 엄청 고생했다 + MVC 랑 webflux 관련 공부가 더 필요해보인다)
지금은 그냥 MVC 는 동기 , WebFlux 는 비동기 정도로만 생각하려한다 게이트웨이의 경우에는 다양한 요청을 동시에 처리해야하기 때문에 WebFlux 를 사용했다
import org.springframework.context.annotation.Bean;
import org.springframework.context.annotation.Configuration;
import org.springframework.security.config.Customizer;
import org.springframework.security.config.annotation.web.builders.HttpSecurity;
import org.springframework.security.config.annotation.web.configurers.AbstractHttpConfigurer;
import org.springframework.security.config.annotation.web.reactive.EnableWebFluxSecurity;
import org.springframework.security.config.http.SessionCreationPolicy;
import org.springframework.security.config.web.server.ServerHttpSecurity;
import org.springframework.security.web.SecurityFilterChain;
import org.springframework.security.web.server.SecurityWebFilterChain;

@Configuration
@EnableWebFluxSecurity
public class SecurityConfiguration {
    @Bean
    public SecurityWebFilterChain securityWebFilterChain(ServerHttpSecurity http) {

        http.csrf(ServerHttpSecurity.CsrfSpec::disable).formLogin(ServerHttpSecurity.FormLoginSpec::disable);

        http.authorizeExchange(auth -> auth.anyExchange().authenticated());

        http.oauth2ResourceServer(oauth2 -> oauth2.jwt(Customizer.withDefaults()));

        return http.build();

    }
}
기존과 좀 다른 형태이다 !!!
이렇게하면 세팅은 완료 !! 이제 테스트를 해보자 게이트웨이와 api 서버 모두 켜주자
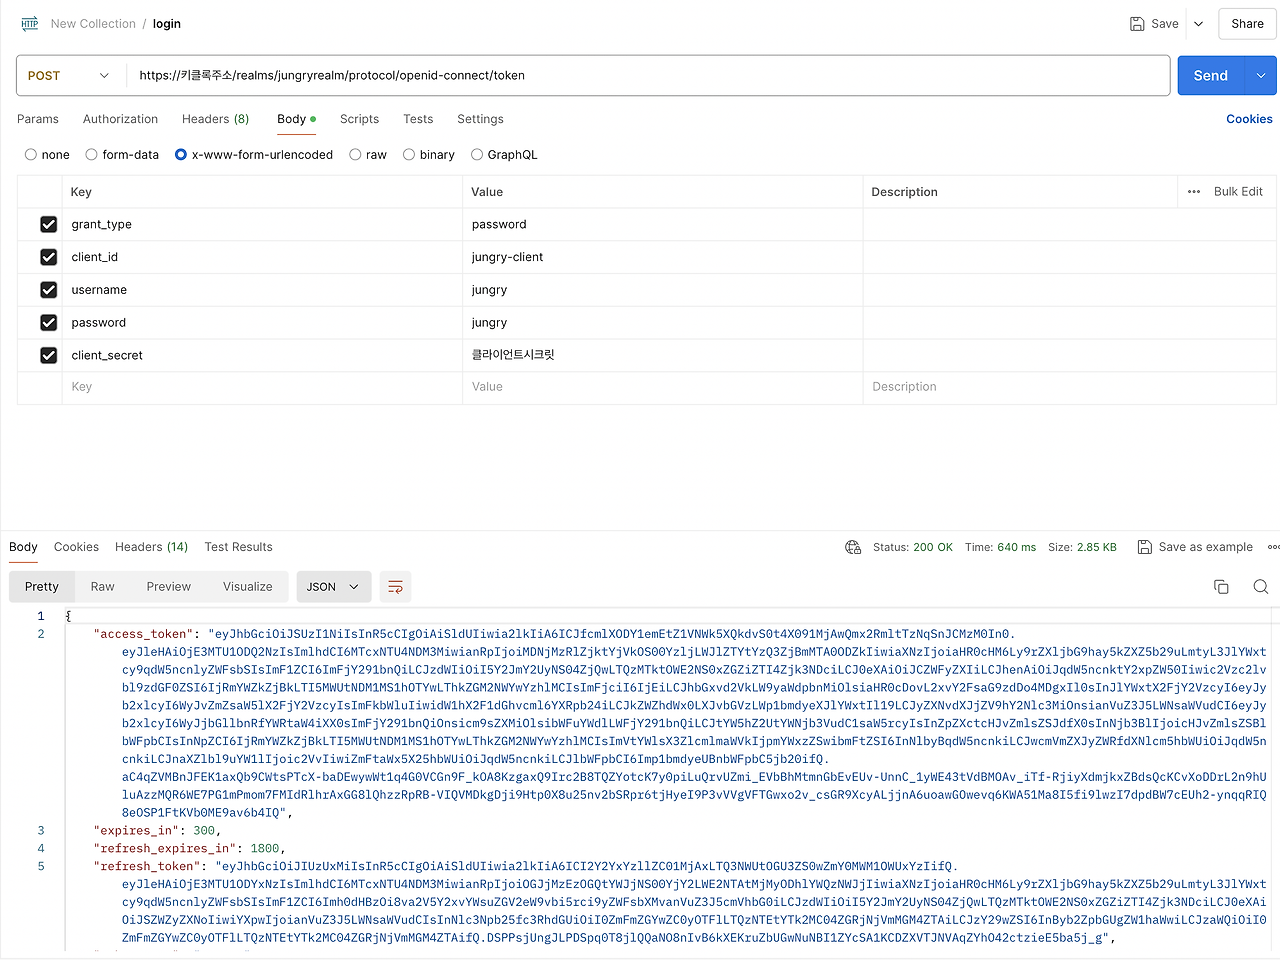
로그인을 해서 token 을 받는다 !!!
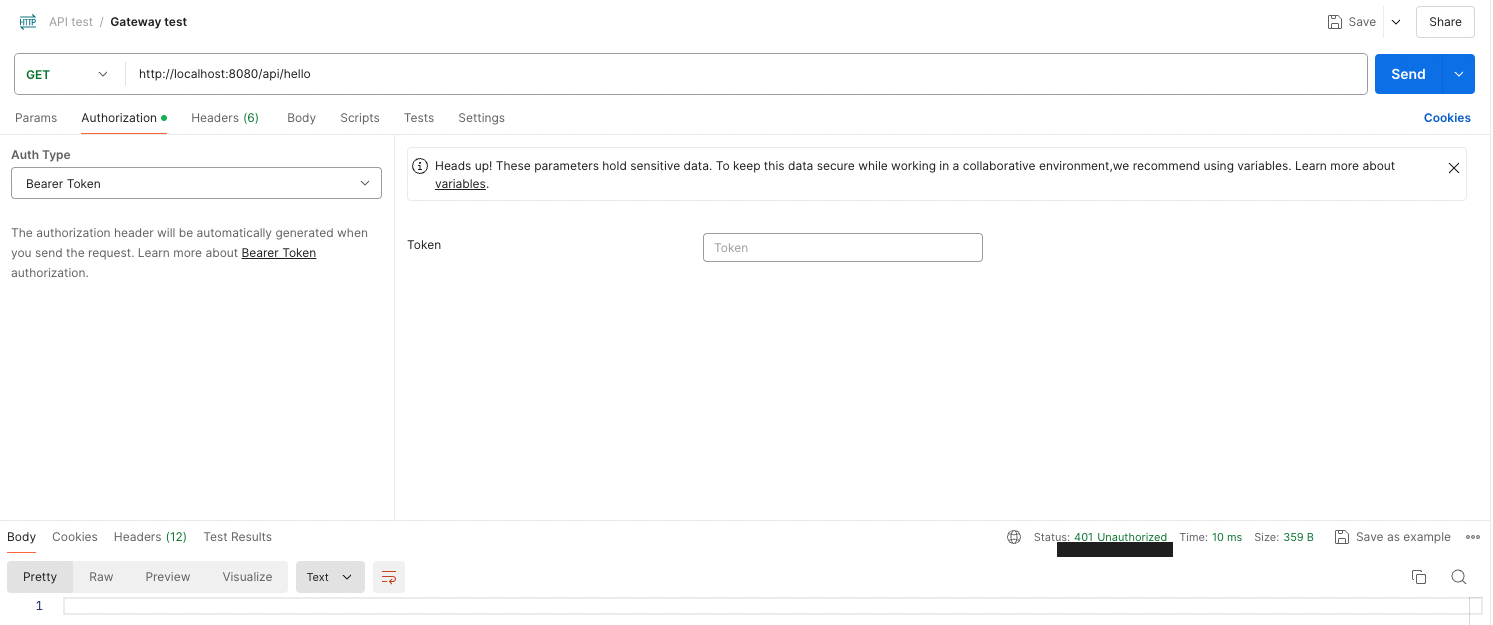
게이트웨이 주소로 접근해서 token 없이 api 를 실행하려고 하면 401 이 나오는걸 볼 수 있다 !!!
나는 api server controller 에서 /hello 라고만 설정했는데 /api/hello 로 요청했을때 에러가 아닌 401 이 나오는 걸 보면 정상적으로 연결된 것을 알 수 있다
로그인 token 을 넣고 실행해보면
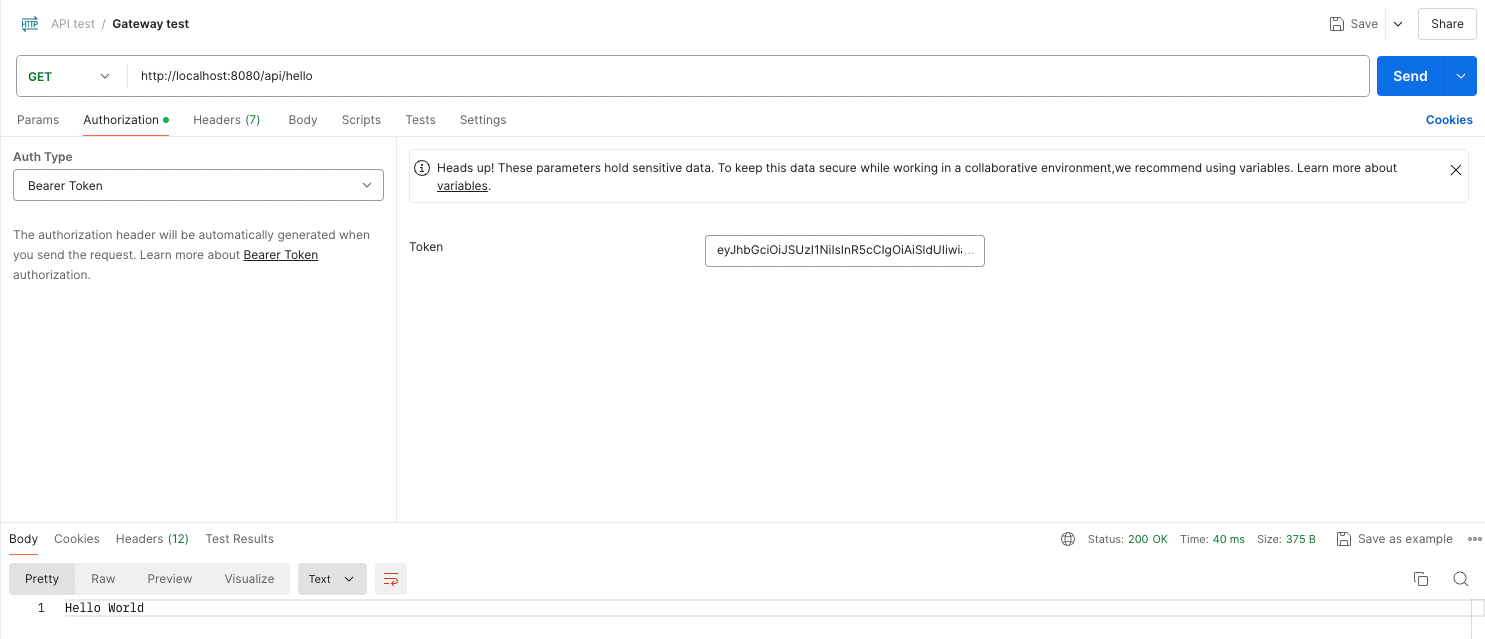
정상적으로 출력되는 것을 알 수 있다
api server2 에 해당하는 요청을 보내면
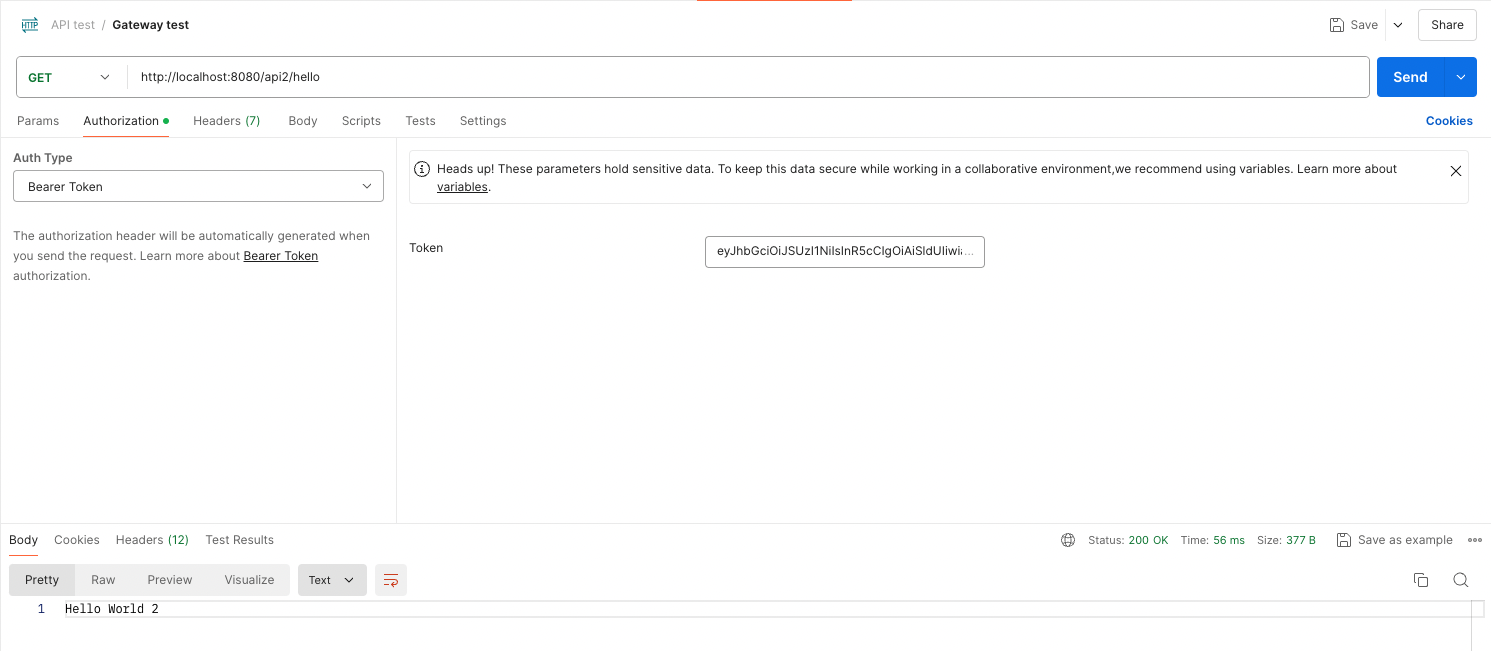
이또한 정상적으로 작동하는 것을 확인할 수 있다 !!!
'JAVA > PROJECT' 카테고리의 다른 글
| [Spring] spring cloud gateway global filter (2) | 2024.05.20 |
|---|---|
| [Spring] intellij 멀티모듈 만들기 + 의존성 추가 (1) | 2024.05.15 |
| [Keycloak] Springboot 와 keycloak 연결하기 (keycloak 24.0.3, spring 3, java 21) keycloak spring boot starter deprecated, csrf deprecated 해결 (1) | 2024.05.14 |
| [Docker] Docker 환경에 Postgresql 설치하기 (Docker compose 로 설치) (0) | 2024.04.22 |
| IntelliJ build 하고 배포하기 (0) | 2022.03.18 |


